The review concerns a Telekom FTTH connection and therefore applies to Telekom subscribers (formerly Cosmote).
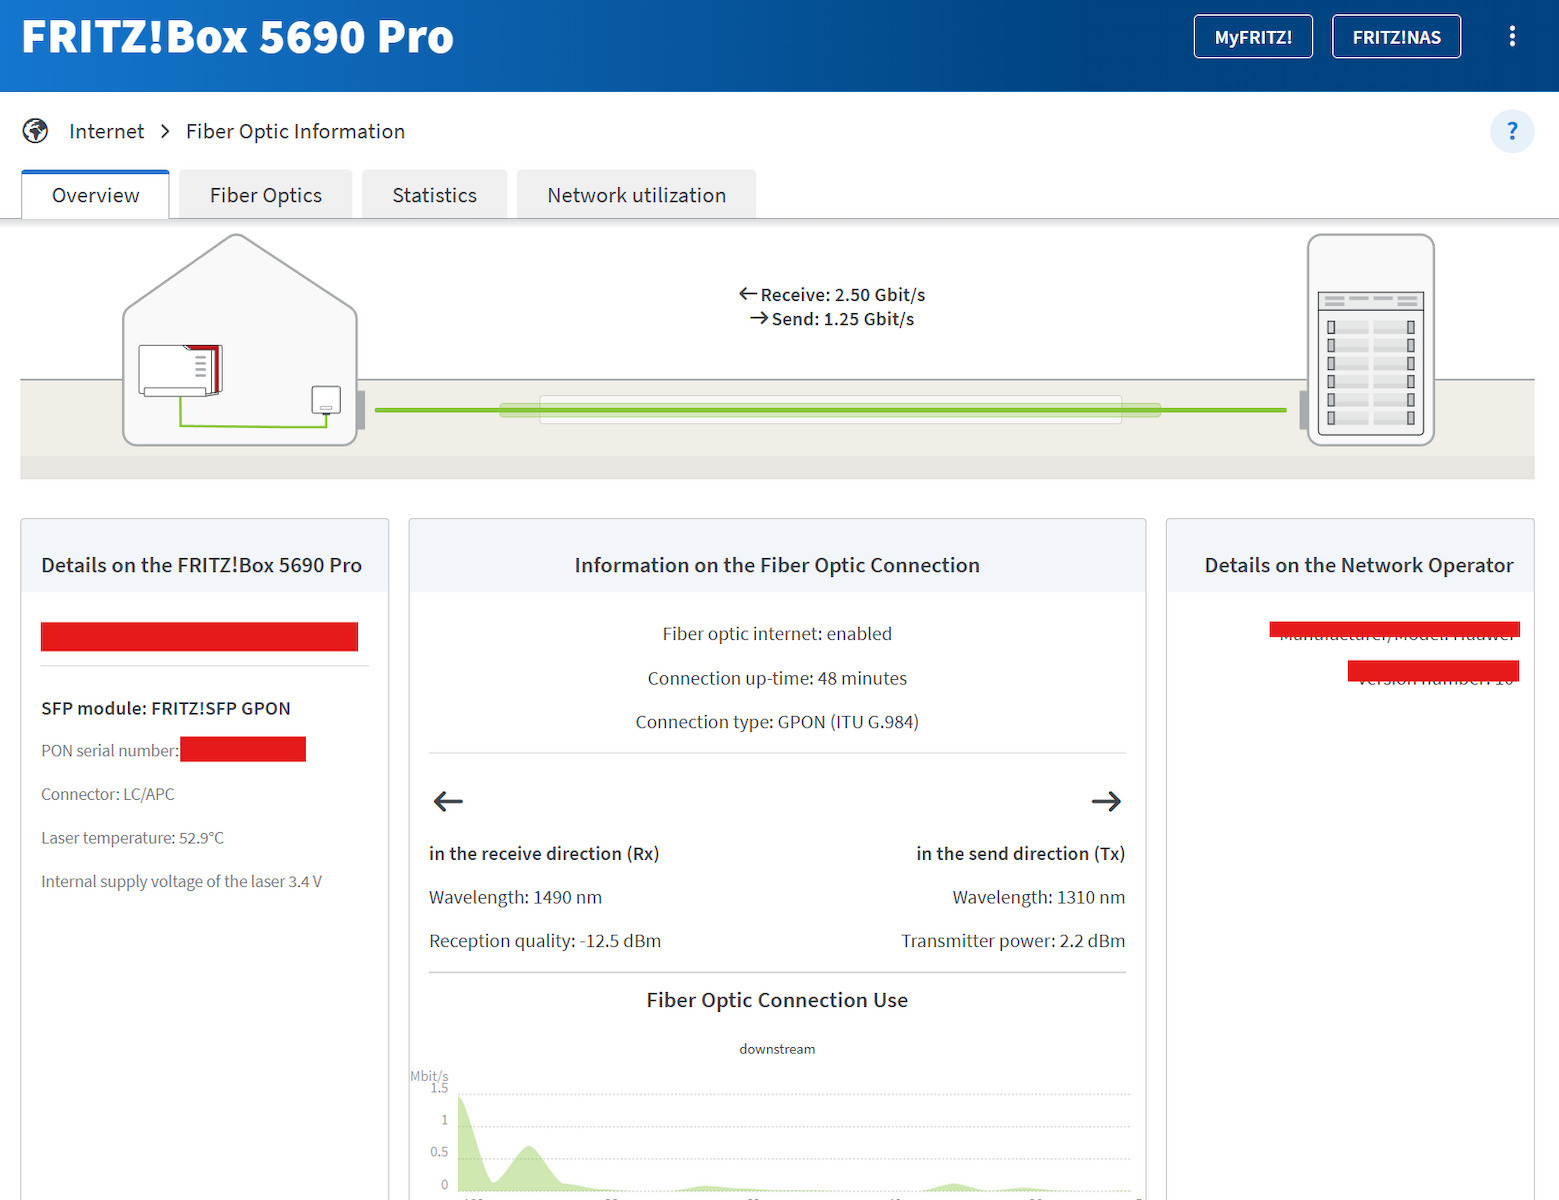
First of all, for those interested in connecting the router directly to the fiber optic socket, this is possible. The box includes an SC/APC cable (the thick fiber optic cable you probably already have) to LC/APC (smaller and slimmer than SC), since the SPF module (the fiber optic port) accepts an LC/APC connector.
The first step is activating the Fiber connection. If your provider has given you a separate ONT (the box to which the fiber optic cable connects first and from there Ethernet comes out for the router), then you need to find and note its serial number, as it must be entered into the FritzBox. Usually it is on a sticker on the ONT as well as on its box (if you did not throw it away). The serial number is in the form ALCLxxxxxxx.
To enter the serial number, you need to go to the side menu Help and Info and all the way down to Fritz!Box Support, and then find the PON PLOAM option. After filling in the serial number and pressing Apply Setting, the router will be able to join the network.
Then, after waiting a little while for it to synchronize with the fiber optic line, you can go to the side menu Wizards and "Configuring the Internet Connection". Since you have connected the fiber directly to the Fritz, you should select "Using Fiber Optic for Internet Access". If you bought the router from an official AVM reseller, it will probably already have the COSMOTE profile installed.
In the next step, where it says Account Information, if you have selected the COSMOTE profile, the details such as [email protected] will already be filled in. You do not need to change anything at this point, as it will automatically retrieve your personal details later via TR-369, so you can simply press Next.
At this stage the internet should work. If for some reason it does not, your connection is probably native IPv6. You should go to the side menu Internet and then to the IPv6 tab. If the setting "Use native IPv6 connection" is selected, make sure to enable the checkbox "Automatically determine IPv4 connectivity". (Only do this if you do not have internet; otherwise it is not necessary.)
Finally, for telephony, you will need to apply to Cosmote so that the SIP code is sent to you (call 13888 to ask about the procedure). Be careful: after you complete the process and send the request they ask for, they will send you the code by SMS. This code must be activated within 30 minutes, otherwise it expires. I recommend doing the process after you have left it for a while from the time you activated it and have internet, so that the router has time to receive the correct internet settings (leave it about 15 minutes).
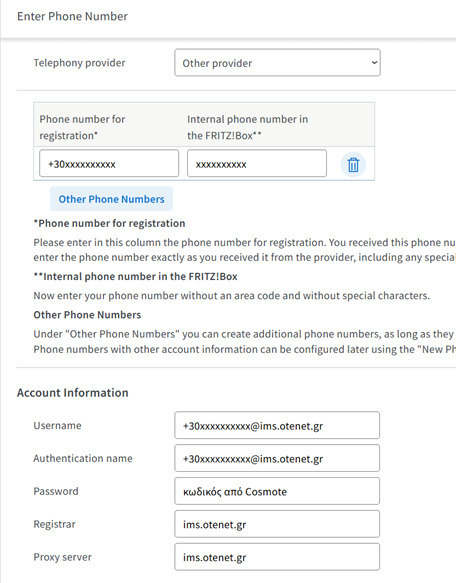
Let us assume that we have the code and it is valid. You need to go to the side menu "Telephone Numbers and New Telephone Number". In the Telephony provider option, select "Other provider". In Phone number for registration* enter your landline in the form +30xxxxxxxxxx, while in Internal phone number in the FRITZ!Box** enter the number again without the +30. In Account Information, enter as Username [email protected], and the same for Authentication name. The Password field is the code we received from Cosmote, while in the Registrar and Proxy server fields enter ims.otenet.gr.
Below, in Additional Settings, enable "Use phone number for registration" and "Always register via an internet connection checkbox" and press Next and then Next again. It should show green that the number has been activated and everything is OK.
In conclusion, FritzBox routers offer stable internet and telephony with many additional settings that the provider’s router may not offer (such as DECT that works properly or Wi‑Fi 7, for example), with fewer line interruptions and support for more devices without any problem. However, I do not recommend it for a complete beginner, as the mobile companies will not provide you with help in case of a fault or for its configuration and setup.





Be the first to leave a comment!