

Mobile Screen Protector: Step-by-Step Installation
Have you just gotten your new mobile phone and want to protect it from scratches, dust, and other factors that can wear it down? Or maybe it’s time to replace your old screen protector and you don’t want to have to go back to that “specialist” who installed it for you years ago?
Whatever the case, below you can find the steps you need to follow for a professional result on your own at home!
What will you need?
- Screen protector glass, suitable for your phone model
- Cleaning wet wipe, which is usually included in the package
- Dry microfiber cloth, which is usually included in the package
- Dust stickers or cellophane tape (optional)
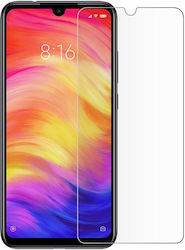
Find the screen protector that fits your phone


Step 1: Prepare your space
- Ensure that the surface where you will be installing is clean and flat, without direct contact with a lot of dust.
- It is advisable to turn off your device during the process to avoid any accidental pressing.
- Remove the case or the old protector from your phone so you can work on it afterward.
Step 2: Thoroughly clean the phone screen
- With the wet cloth, which you will usually find inside the packaging of your protector, wipe the screen well and carefully to remove any dirt present.
- Then, use the dry cloth to remove any remaining moisture left by the wet cloth.
- Finally, with the help of a dust sticker or a piece of tape (if the sticker is not included in the package) remove any dust particles that may have remained on your screen.
Step 3: Prepare and then place the protector
- Before removing any film, check which side the protector should be placed on, by checking the positions for buttons, the camera, or sensors.
- Carefully remove the protective film from the side that will stick to the screen, without it touching the screen yet.
- Once you are sure of the above, slowly place the glass over the screen, ensuring it aligns correctly with the edges and openings of the device.
- Finally, start placing the glass from the middle towards the edges.
Step 4: Remove any remaining air bubbles
- Many protectors come with a special tool for removing bubbles. You can use it and with movements from the center to the edges, remove the remaining air.
- Alternatively, use your fingers, pressing again from the center to the edges.
- Or you can use an object, such as a bank card, to do exactly the same job. Be careful! Do not press too hard, as you may cause damage to the protector.
Step 5: Do the final check and...done
- Make sure everything has gone as it should and remove the protective film on the top (if there is any).
- Finally, clean the surface again with the microfiber cloth to remove any fingerprints and your phone is all set and protected.
Be the first to leave a comment!