

5 Ιδέες για χειροποίητες παιδικές στολές
Οι απόκριες πλησιάζουν και ψάχνεις να βρεις τρόπους - οικονομικούς - να δημιουργήσεις την τέλεια στολή για το παιδί σου.
Με ελάχιστα υλικά, μπορούμε να δημιουργήσουμε τρομερές μεταμφιέσεις, από βασιλιάδες και βασίλισσες, μέχρι φαντάσματα και σαλιγκάρια!
Αρκεί να έχεις φαντασία...

Δες όλες τις ιδέες για αυτοσχέδιες αποκριάτικες στολές:
#1: Προσοχή! Φάντασμα!!!
Χρησιμοποίησε λευκά ή/και διάφανα υφάσματα, όπως σεντόνια και πρόσθεσε λεπτομέρειες με μαρκαδόρους ή χρώματα.

Θα χρειαστείς:
- Ένα λευκό σεντόνι ή πουκάμισο (κατά προτίμηση παλιά)
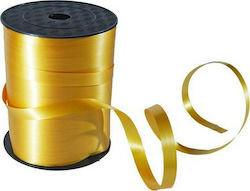
- Κορδέλες, κομμάτια υφάσματος ή άλλα υλικά για να προσθέσετε λεπτομέρειες και να δημιουργήσετε ένα μοναδικό στυλ.
- Μαρκαδόρους ή χρώματα για τη δημιουργία μαύρων ματιών, για extra δόση τρόμου.
Στην πράξη:
- Πάρε ένα κομμάτι λευκό πανί, κόψε ασύμμετρα τις άκρες του, τόσο ώστε να είναι στο ύψος του παιδιού.
- Σχημάτισε με το ψαλίδι τα μάτια και ιδανικά με μαύρο μαρκαδόρο ζωγράφισε τα μάτια στο πανί, ώστε να δημιουργηθεί βάθος.
- Αν κολλήσεις παραπάνω υφάσματα όπως κορδέλες ή υφάσματα όπως σατέν ή δαντέλα θα δώσει περισσότερο στυλ στο όλο look.
Κόστος:
- Περίπου: 0 - 10 €
#2: Αστεράκι μου λαμπρό...
Εδώ το χαρτόνι είναι το βασικό σου υλικό. Τα χρώματα και το glitter είναι επίσης υποχρεωτικά.

Θα χρειαστείς:
- Χαρτόνι
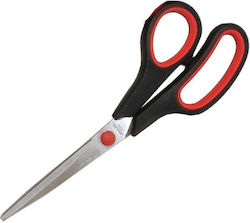
- Ψαλίδι για κόψεις περιμετρικά το χαρτόνι
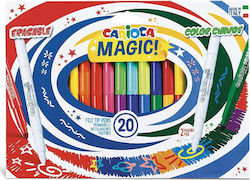
- Μαρκαδόρο για σχεδιάσεις το αστέρι
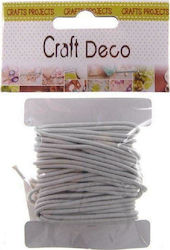
- Λάστιχο
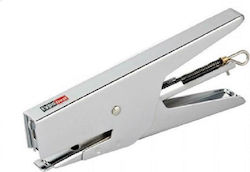
- Συρραπτικό
- Χρώματα αν θες να κάνεις παραπάνω σχέδια (προαιρετικό)
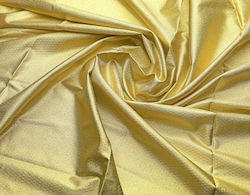
- Ύφασμα στο ίδιο χρώμα αν θες να το χρησιμοποιήσεις ως κάλυμμα για το σώμα ή αλλιώς ως διάττοντας αστέρας!
- Κόλλα
- Glitter
Στην πράξη:
- Πάρε ένα κομμάτι χαρτόνι.
- Σχημάτισε με τον μαρκαδόρο το αστέρι που θα κόψεις αργότερα και το μέρος που θα περάσει το πρόσωπο.
- Κόψε το χαρτόνι προσεκτικά πατώντας στις γραμμές που σχεδίασες νωρίτερα.
- Με ένα συρραπτικό κάρφωσε ένα λάστιχο από τη μία πλευρά μέχρι την άλλη ώστε να μπορεί να σταθεροποιηθεί στο κεφάλι του παιδιού.
- Πέρασε το ύφασμα γύρω από τούς ώμους για να καλύψεις το σώμα.
Κόστος:
- Περίπου: 5 - 10 €
#3. Πού πηγαίνεις σαλιγκάρι και κουνιέσαι όλο χάρη;

Θα χρειαστείς:
- Μακρύ παντελόνι ή φόρεμα σε ανάλογο χρώμα (πράσινο, κίτρινο, μαύρο κλπ) για το σώμα του σαλιγκαριού.
- Κομμάτια υφάσματος, πανί ή ένα μικρό πάπλωμα για να δημιουργήσεις το καπάκι του σαλιγκαριού.
- Κουκούλα ή καπέλο σε ανάλογο χρώμα με το σώμα.
- Χαρτόνι ή ύφασμα για να φτιάξεις τα κέρατα του σαλιγκαριού.
- Φελιζόλ ή χαρτόνι για να δημιουργήσεις τα μάτια.
- Μαρκαδόροι ή χρώματα για να ζωγραφίσεις τα χαρακτηριστικά του προσώπου του σαλιγκαριού.
- Κόλλα, ψαλίδια και καρφιά για την κατασκευή της στολής.
- Αντικείμενα για να διακοσμήσεις τη στολή, όπως πούλιες, πέρλες, κορδέλες κλπ.
Στην πράξη:
- Φόρεσε το πράσινο/μαύρο φόρεμα ή παντελόνι.
- Κόψε ένα μεγάλο κύκλο από το κομμάτι ύφασματος ή φελιζόλ για το καπάκι.
- Χρησιμοποίησε την κόλλα για να στερεώσεις το καπάκι στο πίσω μέρος του φορέματος ή παντελονιού. Άφησε αρκετό χώρο για το κεφάλι του παιδιού.
- Ανάλογα με το ποιο επέλεξες, φόρεσε την κουκούλα ή το καπέλο.
- Κόψε δύο μεγάλα κύκλους από το φελιζόλ ή το χαρτόνι για τα μάτια.
- Ζωγράφισε τα μάτια με μαρκαδόρους ή πίσω πίσω κόλλησε τα στην κουκούλα ή το καπέλο.
- Πρόσθεσε διακοσμητικά όπως πούλιες, κορδέλες, πέρλες κλπ. για να δώσεις έξτρα λάμψη στη στολή.
Κόστος:
- Περίπου: 5 - 15 €


#4: Οι μούμιες ξαναζωντάνεψαν!
Στην αρχαία αιγυπτιακή πόλη, οι μούμιες έχουν ξαναζωντανέψει! Με την τρομακτική τους εμφάνιση προκαλούν δέος στους γύρω τους!

Θα χρειαστείς:
- Λευκή ή μπεζ φόρμα ή φόρεμα: Αυτό θα είναι το βασικό ρούχο της μούμιας.
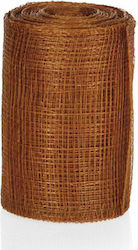
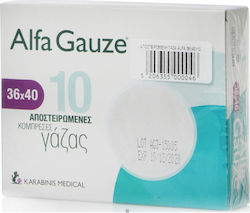
- Γάζα ή ύφασμα: Χρησιμοποίησε τη γάζα ή το ύφασμα για να καλύψεις το σώμα και να δημιουργήσεις την εμφάνιση της μούμιας.
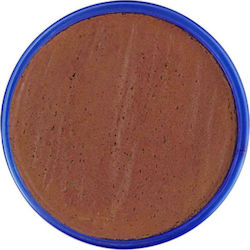
- Καφέ ή μαύρο μακιγιάζ: Θα χρησιμοποιηθεί για να δώσεις ένα φθαρμένο και τρομακτικό χαρακτήρα στη μούμια.
- Καλή κόλλα: Για να κρατήσεις τη γάζα ή το ύφασμα μουμιοποίησης στο σώμα.
- Φακοί επαφής: Αν θέλεις να προσθέσεις έναν επιπλέον τρομακτικό παράγοντα, μπορείς να προσθέσεις στο look, φακούς επαφής που να δίνουν μια σκοτεινή όψη στα μάτια.
Στην πράξη:
- Φόρεσε το λευκό ή μπεζ φόρεμα ή φόρμα πάνω στο παιδί.
- Κόψε μεγάλα κομμάτια από τη γάζα ή το ύφασμα και τυλίξτε το παιδί από την κορυφή μέχρι τα πόδια, αφήνοντας μικρά κενά για τα μάτια και το στόμα.
- Ζωγράφισε με μαύρο χρώμα γύρω από τα μάτια.
- Χρησιμοποίησε καφέ ή μαύρο μακιγιάζ για να δώσεις έναν φθαρμένο και τρομακτικό χαρακτήρα στο παιδί. Μπορείς να ζωγραφίσεις και λίγες "σπασμένες" γραμμές πάνω από τη γάζα για περισσότερες λεπτομέρειες.
Κόστος:
- Περίπου: 0 - 10 €
Halloween: Cutest Kids Mummy Costume


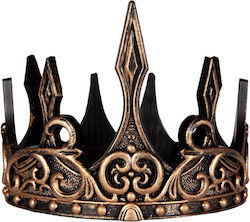
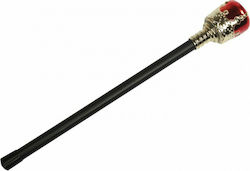
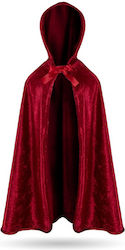
#5: Ακούσατε, ακούσατε!! Ο Βασιλιάς έρχεται!
Στην παράδοση και την ιστορία, ο βασιλιάς αντιπροσωπεύει την εξουσία, την αρχή και τον σεβασμό.
Εάν επιλέξεις τον βασιλιά, αναλαμβάνεις τον ρόλο ενός ηγέτη, ενός ακέραιου και επιβλητικού φυσιογνωμικά ατόμου που κυβερνά το βασίλειό του με σοφία και αυτοπεποίθηση.

Θα χρειαστείς:
- Χαρτόνι για να κόψεις σε σχήμα στέμματος
- Χρυσό ή ασημένιο χαρτόνι ή αλουμινόχαρτο για το διακοσμητικό.
- Κόλλα για να κολλήσεις τα τμήματα μαζί.
- Κρύσταλλα, πέρλες, ή άλλα διακοσμητικά για να προσθέσεις λεπτομέρειες.
- Μολύβι και ψαλίδι για τον σχεδιασμό και το κόψιμο.
- Λουλούδια ή φτερά για να προσθέσεις στο στέμμα, αν επιθυμείς.
- Ύφασμα ή ρούχα σε χρώματα όπως μπλε, πορτοκαλί ή κόκκινο για το κεντρικό μέρος της στολής.
- Ύφασμα σε λευκό ή κρεμ ή κόκκινο χρώμα για την μπέρτα.
- Λευκή ή χρυσή φούντα για το τελείωμα της μπέρτας.
- Ζώνη από χρυσό υλικό για να περιβάλλει το μέση του βασιλιά.
Στην πράξη:
- Σχεδίασε στο χαρτόνι το μέγεθος του κεφαλιού.
- Χρησιμοποίησε το ψαλίδι για να κόψετε το σχήμα από το χαρτόνι.
- Αν θέλεις, μπορείς να προσθέσεις λεπτομέρειες στο στέμμα, χρησιμοποιώντας μολύβι για να σχεδιάσεις μοτίβα ή να προσθέσεις στοιχεία όπως κρύσταλλα ή πέρλες.
- Όταν ολοκληρώσεις το σχέδιο, χρησιμοποίησε την κόλλα για να συνδέσεις τις άκρες του στέμματος.
- Άφησε το στέμμα να στεγνώσει καλά και στη συνέχεια μπορείς να το διακοσμήσεις με τα υλικά της επιλογής σου, όπως μπογιές.
Κόστος:
- Περίπου: 10 - 25 €


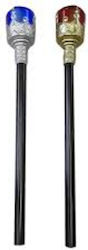

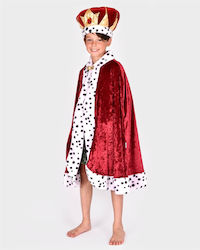
Τέλος, όποια ιδέα και αν επιλέξεις να εμπνευστείς, να θυμάσαι να προσθέσεις μπόλικη αγάπη!!
Σχετικά Άρθρα

Οι καλύτερες αποκριάτικες στολές για παιδιά

Οδηγός αγοράς 3D Printer Filament
Οι πιο δημοφιλείς 3D εκτυπωτές για κάθε χρήση
Άφησε πρώτος το σχόλιό σου!